One of my annual summer projects as a course director is to update the PowerPoint
slides my instructors and I use in our speed reading class, and then update
the lesson plan binders to reflect the changes. The lesson plan pages include
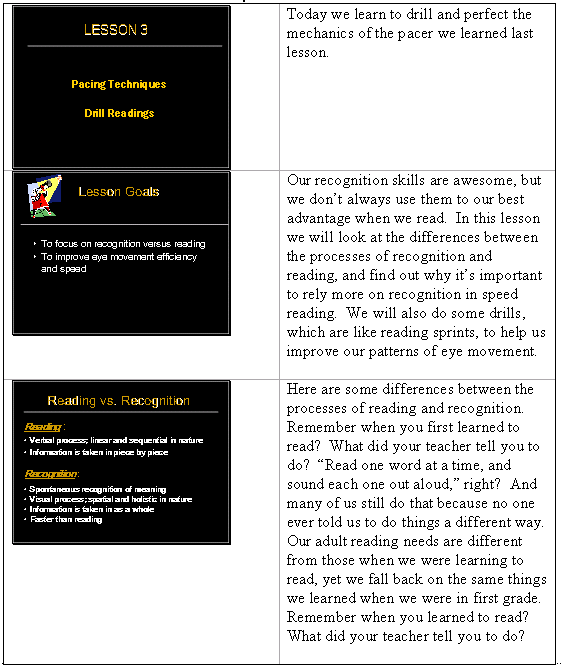
a picture of the slide and the notes alongside the picture, plus white space
for more handwritten notes. This is a particularly useful tool for instructors
who are new to the course or who are substituting, and for seasoned instructors
who are still getting used to newly incorporated material.
Here is a sample page from one of our speed reading lesson plan books:
SAMPLE LESSON PLAN PAGE:

Each page is three-hole punched and placed in a three-ring binder, and tabbed
dividers are used to separate each lesson.
In addition to PowerPoint slide pages with notes, copies of handouts for students,
pertinent readings, and other resources are included with each lesson. It's
a very organized way to have all the materials you need for the lesson together
in a binder.
Here is how to make these pages, using Windows XP (other versions of Windows may differ):
Questions or comments? Contact the author at ym5330@usma.edu.