![]()
January 2002 Issue
![]()
MS Word Tip
By Mon Nasser
Email: mon@ao.net
 Horizontal
Lines
Horizontal
Lines
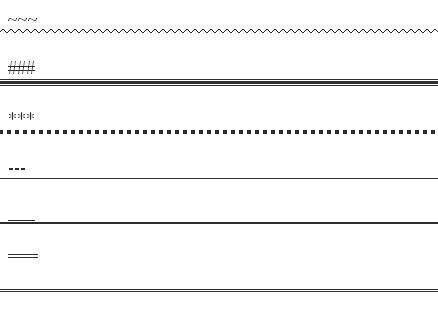
Horizontal lines are handy for dividing segments of your document and for highlighting important sections. MS Word provides a powerful shortcut for creating these lines. Simply type a special character in a new line a few times (3 times minimum) and press <Enter>. Word will create the line for you automatically! There are several types of lines to choose from depending on the character you type. The following screenshot shows the character at the top and the line generated when <Enter> is hit:
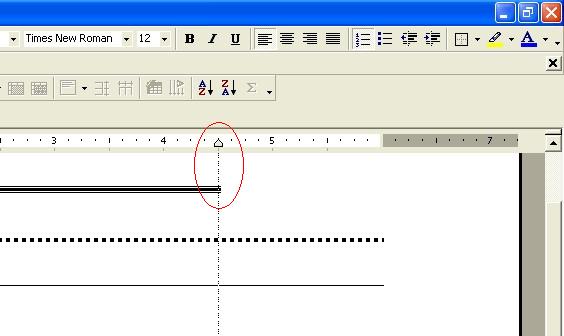
If you need to resize the width of the created line, click above the line and move the margin markers on the ruler. Here is an example:
Deleting the created line is not intuitive. If you try to position the cursor above the line and hit <Delete>, the line will just move up! One way to delete the line is to use the mouse to select the entire paragraph containing the line and then deleting that paragraph. This may not work well if you have text around the line. Another way is to position the cursor above the line and select "Format" - "Borders and shading..." from Word's menu, then click on the box "none".
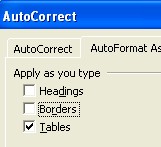
If you don't like this feature at all you can disable it by clicking on "Tools" - "Auto Correct ..." in Word's menu. The AutoCorrect dialogue box will appear. Click on the "AutoFormat As You Type" tab. Uncheck the "Borders" check box and click on "OK".
*~*~*~*~*~*~*~*~*